How to Do Concrete
Placing – Finishing – Curing
(Part 4 of 4)
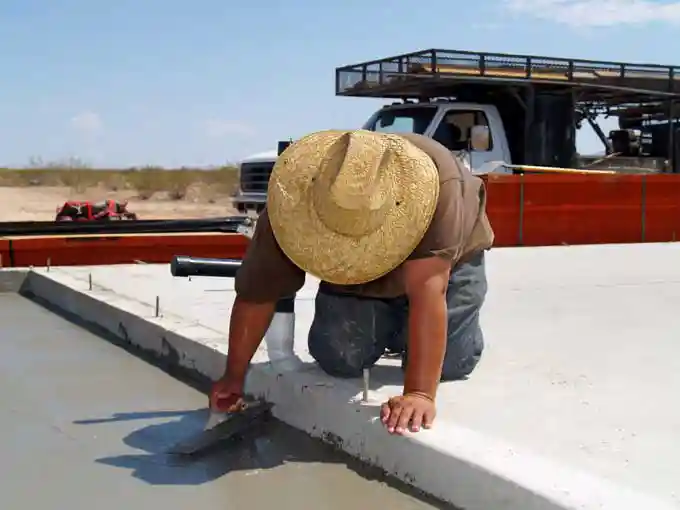
How to finish concrete: Placing concrete
Concrete must be discharged in a timely manner upon arriving to the job site. If you are using wheelbarrows to move the concrete from the truck to the forms, make sure you have enough help to finish the project in a timely manner. Concrete delivery should be closely coordinated with placing and finishing operations. Concrete should not be poured faster than it can be worked – spreading, consolidating, bull floating. Instead, concrete should be poured continuously as near as possible to its final position. You should never dump concrete into separate piles and work together.
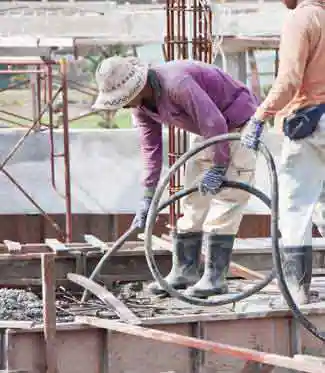
Consolidation of Concrete
Placing concrete in forms and then consolidating is popular for some types of construction (i.e. Pouring Formed Columns, Beams Etc.). The consolidation process uses vibration and gravity to compact fresh concrete within the forms and around embedded items and reinforcement. This process eliminates unwanted pockets of trapped air, honeycomb, and stone while maintaining significant amounts of entrained air. The vibration temporarily suspends the natural friction between the aggregate particles, causing the concrete to behave as a liquid. Internal friction resumes as the vibration is stopped. Vibrators can be found at most rental supply stores.
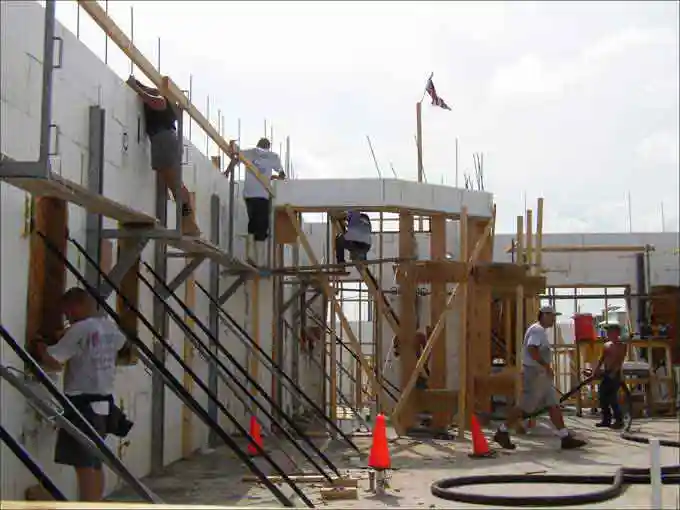
When pouring concrete into ICF’s (insulating Concrete Forms) we do not recommend using Pencil Vibrators, instead use a wall banger for consolidation. ICF’s are poured in 4’ lifts, if you use a pencil vibrator you risk re-liquefying the lifts below. This will increase the pressure at the bottom of the forms and risk a blow out.
How to finish concrete: Finishing Slab on Grade
Visible concrete slabs used for driveways, patios, etc. will often need finishing. You can finish your concrete in many ways, including color tinting, texturing, and Patterned-stamped finishes. These are considered advanced finishing techniques and will only be covered briefly in this section. Some surfaces may require just strike off and screeding to proper contour and elevation. Others will require a broomed, troweled or floated finish. In this section we will take you step-by-step through the process.
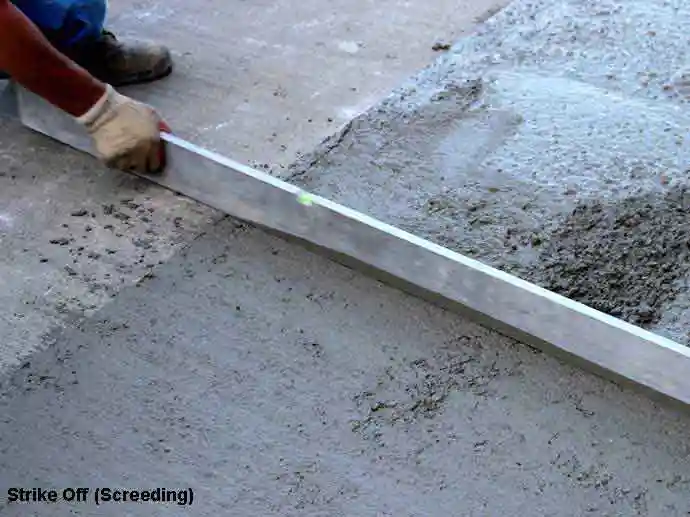
Strike off operation is key the achieving a true plane surface. A screed is the tool used to accomplish this task often made of wood (2” x 4” Lumber), magnesium, or aluminum. Because the tool is called a screed this process is often referred to as screeding. “Screeding” is most commonly used word to describe this process in this area. Screeding is the process of cutting off excess concrete to bring the top surface of the slab to proper grade. The screed should be 1 1/2’ – 2’ longer than the slab is wide so that it always rides on the forms. A straight edge is moved across the concrete with a sawing motion and progresses forward a short distance with each movement. The screed should be tilted slightly toward the operator so that there is a single cutting edge.
To fill in low points keep approximately 1 inch of concrete rolling in front of the straight edge. Remove excess concrete with a flat shovel or a hoe-like tool called a come-along. Frequently two passes with the screed is necessary to achieve desired grade.
If you are going to be pouring a large slab with a width of 15’ feet or greater it becomes difficult to strike off this much concrete. Even at fifteen feet you will need three people working the screed. At this point instead of relying solely on the side forms temporary pipe, or rails can be used. The use of grade stakes placed throughout the pouring area will help give the crew reference points to level the slab as they go. If you drive the grade stakes in far enough to accommodate the temporary rail and still be at desired grade this system works very well. Use metal grade stakes so you can pull them up or bend them over as they are no longer need. I have seen many crews that have been pouring for years only use grade stakes and forgo the rails.
There are hand-drawn and power drawn vibrating screeds that can be used to strike off and consolidate the concrete at the same time. They can be ordered with single beam, double beam, or truss type straight edges.
Bull Floats & Darbies
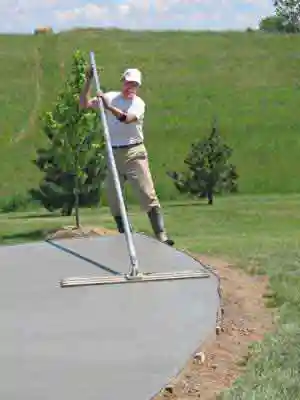
Bull Floats and darbies serve the same purpose however, daries are typically use for small areas. Both are used to eliminates high and low spots, and to slightly embed large aggregate particles immediately after strike off. These floats will also work up more paste to the top of the slab to help in finishing later.
Bull floats are large, long handled floats that are used while standing. There long extendable handles are used for reaching across large slabs. Bull Float blades are usually 8” wide and 3’ – 8’ long and come with a fix head or pivoting head. Fix head bull floats require the finished to lower the handle thus lifting the front of the blade as he pushes it across the surface, then he must lift the handle to raise the other side of the blade on the return. The distance that the float can effectively be used is limit by the reach of the finisher. The alternative is using a pivoting blade head. By rotating the handle the finisher can raise and lower the blade allowing the finisher to reach much farther. (Note: when adding on additional screw in handles to reach farther distances beware of overhead power lines)
Darbies are held in the hand, while the finisher kneels on knee boards. Darbies range in length from 28” – 45” long, and the width tapers from 2 ½” – 3 ½” at the handle. The longer Darbies will have two or three handles for better control.
Bull Floats are made of Wood, Aluminum, or Magnesium. Darbies are made of wood and Magnesium. Wood Darbies and Bull Floats are used on slab that are not air-entrained or slab that have slumps of less than 4”. The wood grains texture makes them least likely to seal the surface before bleedwater has a chance to bleed off and dissipate.
Bull Floating
Start bull floating or using the darbie immediately after the strike-off and finish before the bleed water appears. If possible have a finisher follow the strike-off crew with the bull float. If you are limited on help, stop every few yards and bull float the slab as you go.
When bull floating pass the float across the slab perpendicular to the direction of the strike-off. Keep the leading edge of the bull float slightly elevated so that it does not dig in to the slab. Avoid creating high spots near the edge of the forms by bring the bull float blade all the way to the edge of the form. Use a hand held float to go back and float around the edges. If low spots remain add concrete to that area and float again. Note: Do not over float the surface. Do not slop the cream off the sides of the forms: you will need this later for finishing.
When using the Darbie, hold it flat against the surface and work in a sawing motion across the slab. Keep Darbie as flat as possible to keep from sealing the surface. When the surface is level, tilt the Darbie slightly and sweep it across the surface to fill small impressions left by the sawing motion.
Wait for Bleedwater to Evaporated (After the initial Float)
You do not need to wait for bleed water to evaporate on the first pass of the Bull Float or Darbie. On some slabs all that may be required is one pass of the bull float; however on most slabs additional finishing will be required.
Before any further finishing is started, the finisher must wait for the bleedwater to evaporate. Finishing while bleedwater is present can cause crazing, dusting, or scaling. Sprinkling water on top of the slab or adding straight Portland to the surface to dry up water will also cause serious problems. Don’t start to finish until, when you push on the surface with your finger you only leave a ¼” deep impression.
Edging (Optional)
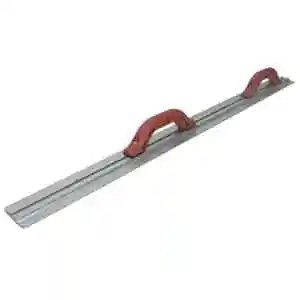
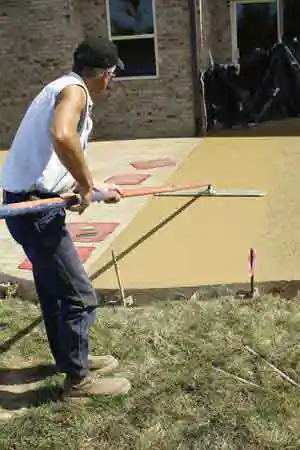
Edging is usually only needed on sidewalks, driveways and steps. Edging is not required on slabs, and should not be done on floors that will be covered with tile. Edging will compact the concrete next to the form where floating and troweling are less effective. This will make the edge of the slab more durable and less likely to chip.
Edging tools have a curved lip that forms the edge. These curved lips range in depth from 1/8” -1 ½” and in radius from 1/8” – 1”. For Driveway, sidewalks, and patios use a lipped edger with a ½” radius. In the case of joints subject to vehicle traffic, use a radius of 1/8”.
Before you start edging, for better results, run a pointed trowel along the forms to dislodge the aggregate away from the forms. Then start the first pass with a wide edger (6” Width x 10” Length). Run the edger in a forward and backward motion keeping the leading edge slightly elevated so it does not dig into the surface. Edger will work better if you do not start in a corner and do not lift edger from the surface unless it is in motion. Use a narrow 2 ½” edger for the second pass. Narrow edger’s tend to be a little squirrely, be careful not to dig into surface. Edging may be required after each finishing operation.
Walking Edger’s, which have a long handle allows the finisher to stand while edging.
Special Edging Tools are available for finishing inside and outside corners of curbs and steps.

Cutting or Tooling Joints
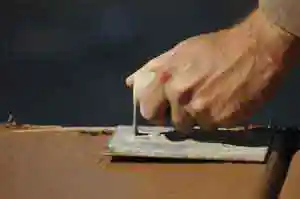
Joints can be saw cut into slab after it hardens (see Controlling Cracks in Slab on Grade Concrete). For floors that must carry heavy forklift traffic, sawed joints are preferred. Tooled joints are formed in the concrete before it sets using a Grooving Tool. As shown here grooving tools come in many different styles, Hand Groovers, Clip-on Groovers, Torpedo Groovers, Rolling Groovers, and more.
To control shrinkage cracks you must use a Grooving Tool that is at least ¼ of the depth of the slab. For Floors the radius of the Grooving Tool should be as tight as possible, no more than 1/8”. For outdoor flatwork a radius of ¼” – ½” in acceptable.
To make a grooved joint simply place the Grooving Tool into the concrete, then push the groover while applying pressure to the trailing edge. Use a board or a chalk line to guide the Grooving Tool along its path. Marking the forms prior to the start of the pour will save time and tend to be more accurate.
Walking Groover’s are available as well as Grover’s for forming vertical grooves in curbs and steps.
On House slabs try to place joints under walls or under carpet areas. Under walls they won’t be seen. Under carpet areas the joints won’t have a chance to telegraph through vinyl or tiled areas.
Floating
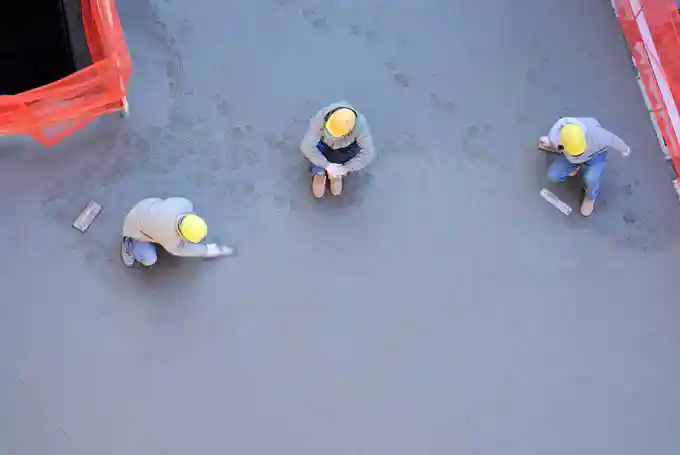
After Strike-Off, Bull Floating or Floating with a Darbie, Edging (if Required), and jointing (If a Grooving Tool is used) the surface is floated a second time. (Only float after the bleedwater has evaporated) The second float removes slight imperfections left in the slab by prior operations, and compacts the mortar at the surface to prepare it for any further finishing if desired.
This second float can be complete by hand trowel, or by a machine trowel.
Hand Floats come 3” – 4” wide and lengths ranging from 12” – 24”. They come in four flavors Wood, Aluminum, Magnesium, and composite material. Save time and frustration and use a magnesium float. Magnesium floats slide easily across the concrete requiring less effort, and produce a better finish.
While floating hold the float flat while sweeping it across the surface in an arc. A float texture has a good non-skid surface. In many instances this texture is used as the final finish for sidewalks, driveways, and patios. If floating is going to be the final surface a second pass with the hand float may be desired.
Final Trowel Finish
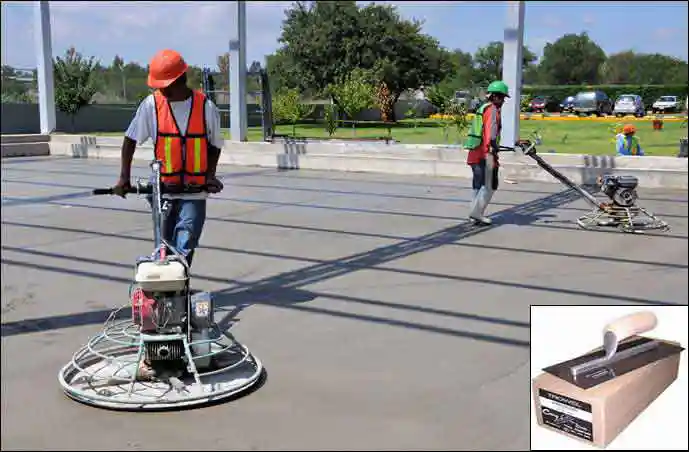
Troweling with a steel trowel is done when a smooth, dense surface is desired, such as a warehouse or garage floor. Troweling is not recommend for external slabs in Florida: add water, a little mold, and someone wearing flip flops and you have an extremely dangerous situation.
Be sure the surface has been floated before troweling. Bull floating or darbying alone are not adequate preparation. To save time the finisher can float the slab then trowel it as he moves across the slab on knee boards.
During the first troweling use a wide trowel (at least 4 ½” wide) one that has been broken in, or a trowel that has the edges machined to give it a broken in feel. This will allow the finisher to work the trowel flat without digging into the surface.
Move the trowel across the slab in a sweeping arc motion, tilting the trowel on slightly to keep the trowel from skipping across the slab. Overlap each pass by at least half of the trowel length this will ensure that the trowel cover the surface twice.
To improve surface wear resistance, and smoothness additional troweling may be desired. On later passes use narrow trowels to increase trowel pressure at the surface.
Fresnos are large trowels that attach to bull float handles. Fresnos are used for troweling slabs that do not require a hard trowel surface. A Fresnos will speed up the troweling process. Fresnos should not be used as bull floats.
Troweling can also be accomplished by machine. Power trowels range in size from small walk-behind machines to larger double or triple rotor ride-on machine. Take care to make sure that all of the blades on a rotor are in the same condition. If one blade is bent or broken, you must change all the blades on the rotor.
Broom Finish
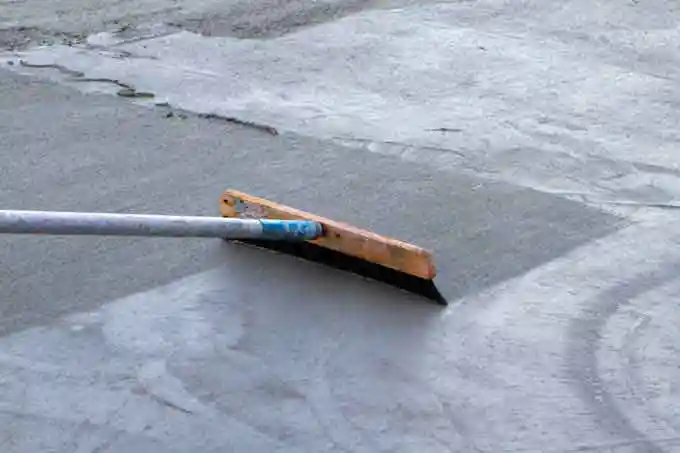
Brooming the concrete before it hardens will produces a slip-resistant surface. Once the surface has been floated or troweled test a small section to see if the concrete has hardened enough to give you the texture you desire.
For best result, use a concrete broom they are specially designed for this purpose. Stiff bristle brooms produce a coarse texture, while a soft bristle brooms will produce a medium to fine texture. Test a small section first to see if it gives you the desired texture. If the broom pulls off to much excess concrete wait a little while and try again.
Pull the broom across the slab at a right angle to the main direction of travel.
To achieve a texture that is sharp and uniform, keep the bristles clean removing excess concrete as you go.
Special Finishes
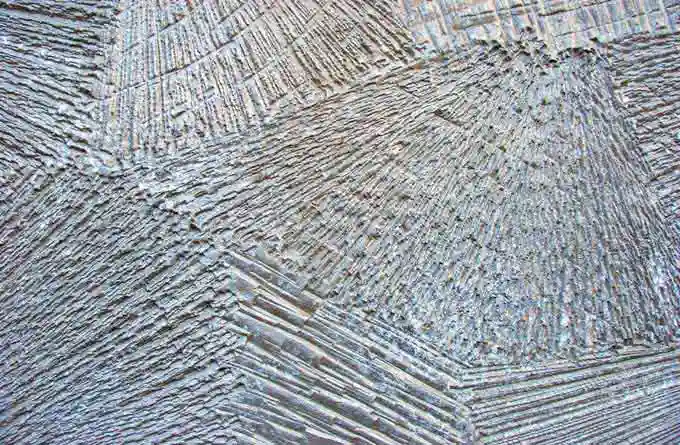
A wide variety of colors, textures, and special techniques can be used to achieve decorative finishes. Here are some ideas however, for most decorative or architectural finishes we recommend that you hire a qualified concrete contractor that specialize in decorative concrete.
- For colored Concrete – Use a dry shake to broadcast color over the surface of a slab then float into top surface. Using multiple colors will give it a different look.
- Try different textures using floats, trowels, brooms.
- Order a mix with one of over 30 different aggregates that we sell, spray the top of the slab with a surface retarder before it hardens then wash away the top mortar to expose an attractive aggregate surface.
- Create patterns by using divider strips, stamping, or scoring the surface. Color is often used prior to the stamping process.
- Surface hardeners are available to use after these special finishes are applied.
- Rock salt can be worked or thrown into slab surface to give it an old world look. As the salts washes away it leave unique impressions.
Curing
Curing is one of the most important steps in concrete construction, because proper curing greatly increases concrete strength and durability. Concrete hardens as a result of hydration: the chemical reaction between cement and water. However, hydration occurs only if water is available and if the concrete’s temperature stays within a suitable range. During the curing period-from five to seven days after placement for conventional concrete – the concrete surface needs to be kept moist to permit the hydration process. A common method of curing (and one of the simplest) is to utilize a liquid Curing Compound which form a membrane which seals in the moisture. This chemical is sprayed or rolled on the surface of a slab after finishing to prevent premature drying of the surface, or water may be used when you are able to insure constant wetting for at least 3 days.
Curing in extreme weather
Temperature extremes make it difficult to properly cure concrete. On hot days, too much water is lost by evaporation from newly placed concrete. If the temperature drops too close to freezing, hydration slows to nearly a standstill. Under these conditions, concrete ceases to gain strength and other desirable properties. In general, the temperature of new concrete should not be allowed to fall below 50°F during the curing period. Membrane curing does not keep the concrete warm enough in freezing temperature, nor does calcium chloride accelerator prevent concrete from freezing. Only adequate insulation or heating will maintain proper curing temperatures during freezing weather.
Curing shortcuts to avoid
Avoid any curing method that lets the surface dry in a short time. Quick drying stops the hardening process, thus making a weak surface that is likely to scale.
